Sometimes you look at people’s website or blog and you are like “How can i create such a beautiful blog like that?” Its not about the beauty of the blog but the content it carries and how profitable it might be. In this tutorial, i am going to teach you step by step on how to create not just a blog but a profitable one as such. These tutorials are for complete beginners and intermediates. Let’s get started!
1. What is the difference between WordPress, WordPress.com and WordPress.org?
2. How to download and install wordpress
3. How to apply wordpress theme
1. The difference between WordPress, WordPress.com and WordPress.org?
I’m going to talk about most of the confusion that beginners face and that is the difference between wordpress, wordpress.org and wordpress.com
When speaking about wordpress we have to make clear distinction between 3 different terms:
1. wordpress
WordPress is the application itself , a free open source web publishing application you can download and install on any server to publish content on the web. It is the actual application we are going to use to create our website. An example of the use of the tern wordpress is, ‘My New Website Is Powered by WordPress’
WordPress.org is the website that hosts the open source project including the application forums, and development. You can download wordpress (the application) from wordpress.org and this is where you will find the official documentation of the application in the form of wordpress codex and the wordpress handhooks, the official support form for wordpress and meetup wordpress.org, the blog network used to publish and discuss the information about the future of wordpress in itself. In short, WordPress.org is the website that provides that application (wordpress) that we are going to use to create our website. An example of the use of the term wordpress.org will be ‘ if you are having a problem with your wordpress site, try asking a question in the wordpress.org forums’.
WordPress.com is a commercial enterprise owned by Automattic that distributes wordpress as a hosted service.
In simple English, wordpress.com is the site that distributes wordpress as a service application for free or at a price. You can build your own website on wordpress.com without having to install wordpress itself but your site will restricted by the site and its rules.
For eg, you cannot install your own plugins and themes on wordpress.com site. You have have to pick from options provided by them. WordPress.com only provides free blogging websites for people who cannot either afford hosting or just wants to quickly create their own blogs. Blogger.com which is by google is also a site which provides free blogs.
If you want to create a free blog you can do so with WordPress.com and the advantage of creating blogs with this site is that it is very easy to create your blog unlike self hosting where you will have to create it by yourself locally and transfer to the live server or creating it on the live server straight away. The disadvantage of using such free site is that, there are lots of restrictions. My basic advice to you is that don’t ever use free blogs because there are lots and lots of restrictions which you cannot bear. An example of the correct use of the term WordPress.com will be ‘I Built my first blog on wordpress.com and now i want to add functionality to it, so i am moving to a self-hosted WordPress site’.
2. How to download and install WordPress
Most of WordPress developers (99%) create their website on a local host and then upload it to the live server and that is what we are going to do. We are going to install it on our localhost and install our themes and plugins there. Don”t worry about these names as i will teach you everything about them.
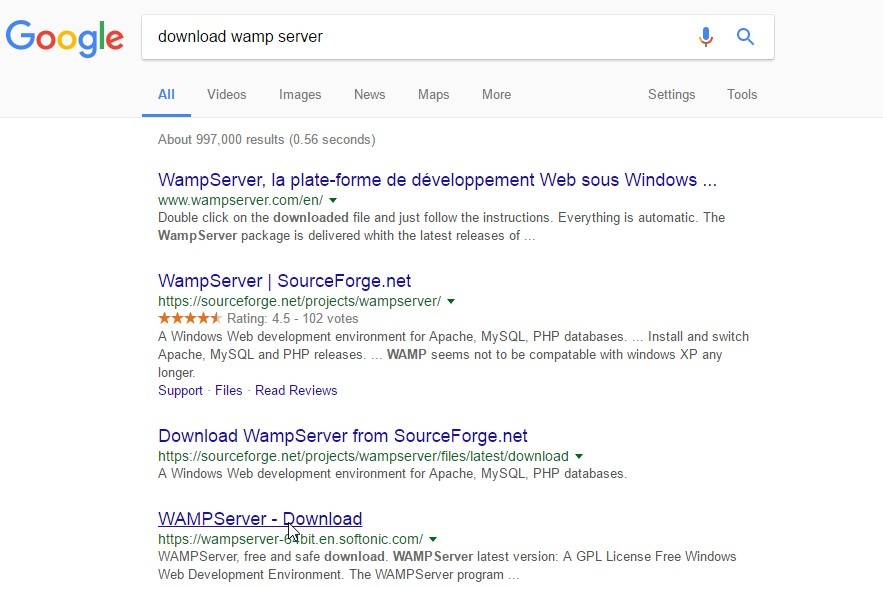
To setup wordpress on our localhost we need to do one thing and that is we need to download the server that will support wordpress on our machine and there are many softwares like XAMPP, WAMP, MAMP and so on. In our case, we are going to use WAMPSERVER. The others are almost the same. To download WAMPSERVER, all you need to do is go to google.com and type wamp server download.
click on the 4th link. This will take you to the downloading page to get you started. Alternatively you can download it here! and skip the steps.
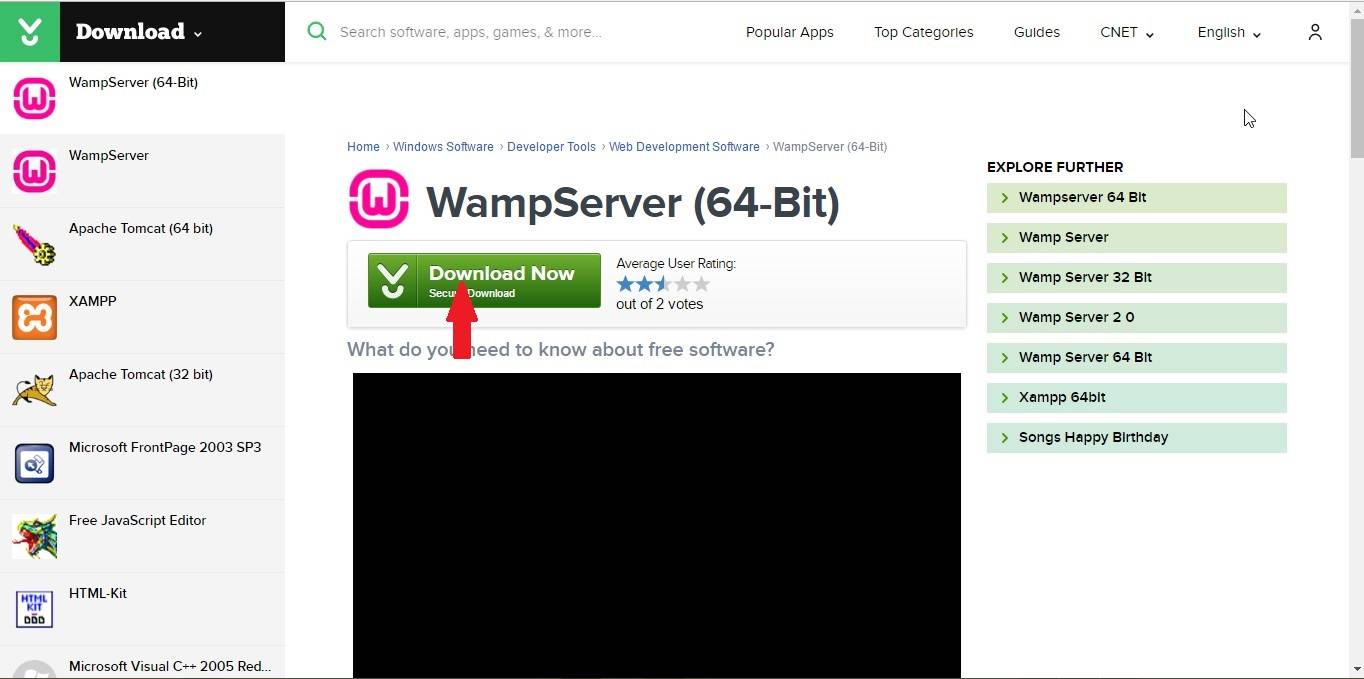
After getting to download page, click on the one you like based on your system. In my case i use windows (64-Bit) so will go in for that version. Click on download Now button and this will successfully download the Wampserver
servers for Mac, Linux which are also present there so choose the one you prefer. They basically all work the same way although I’ve not tried them all.
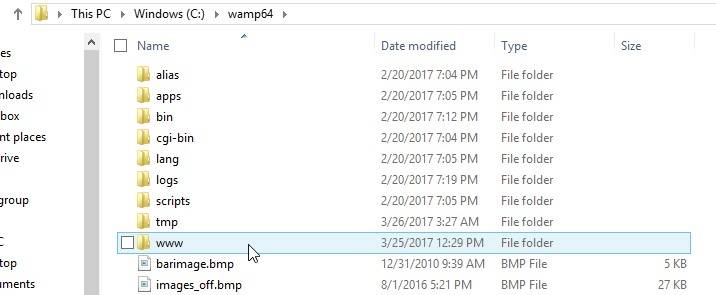
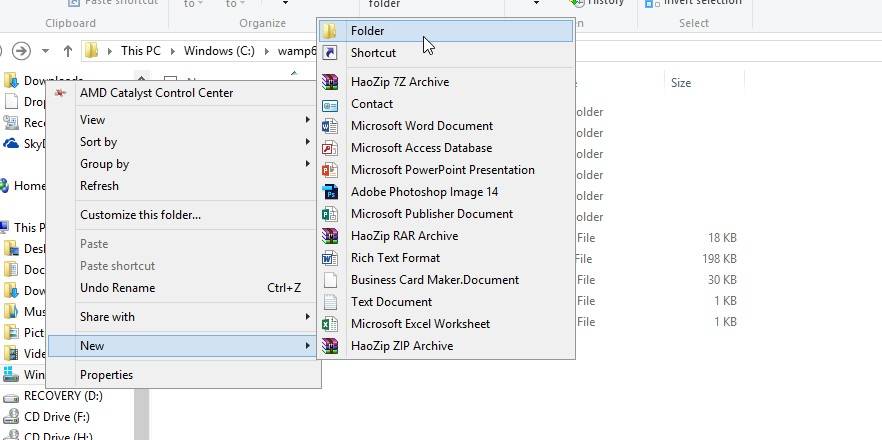
After downloading it, just install it as you will install any software you download by following the instructions in the installation wizard. After installing it, go to where the Wamp server was downloaded which can basically be found by navigating to This PC and then going to windows. You will see Wamp64, open that and head over to the folder called ‘www’. Basically the ‘www’ is like a folder where you put your websites in.
Create a new folder and name it to anything you want, it could be your website’s name or blog.
In my case, i will use ‘health’ as the name of the website i want to manage.
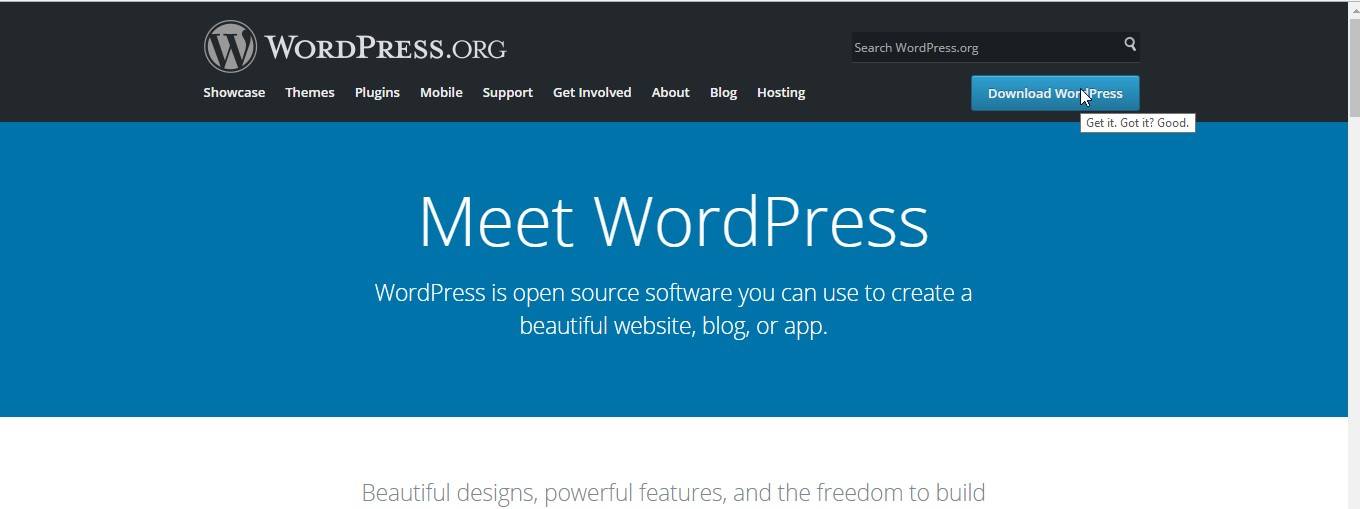
After creating the folder, we need to download wordpress from wordpress.org and put it into the named folder. As i said earlier on wordpress.org is the site we get wordpress, the application from so in order to download it just go to wordpress.org and click on the blue button which says download wordpress. It will take just a minute or two depending on your internet speed.
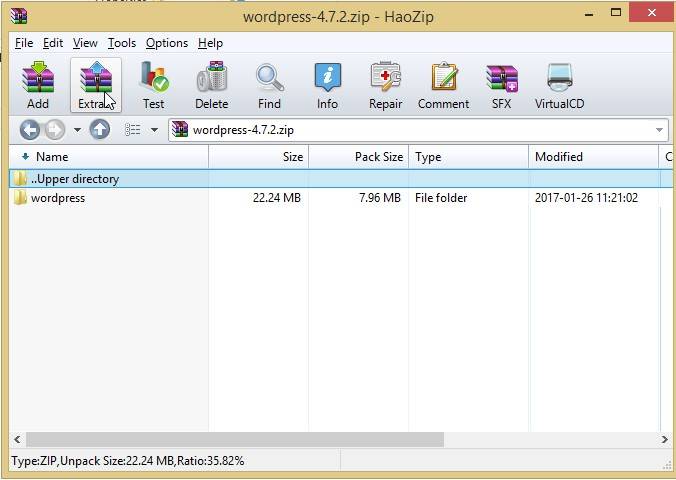
After downloading it, locate and extract the .zip folder into the folder we just created in www directory.
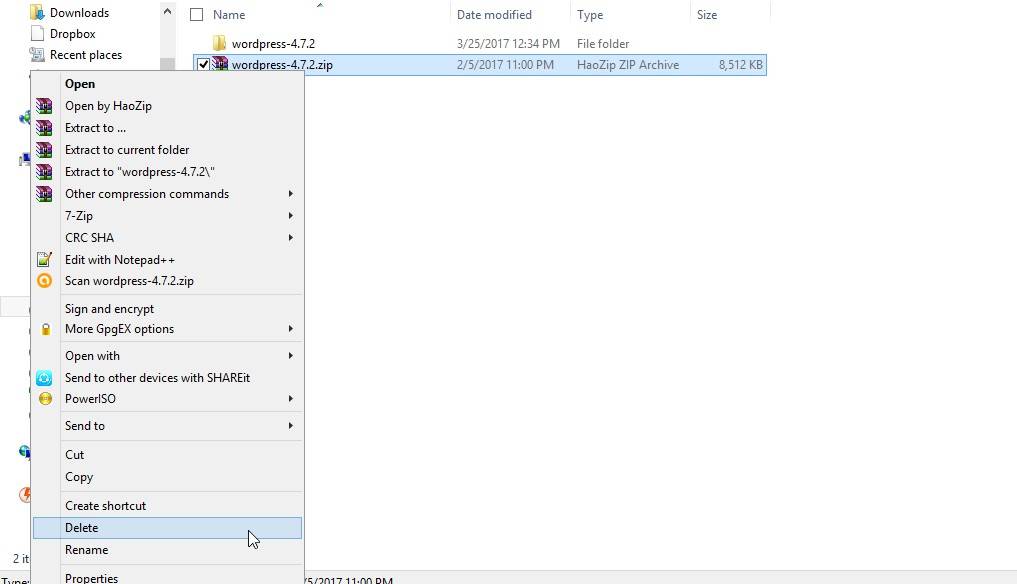
After extracting into that folder, in my case ‘health’ folder, delete the .zip file since it’s no longer needed and open what you’ve just extracted. We only need what’s inside wordpress-4.7.2 and not the folder so cut everything from it and paste into your folder.
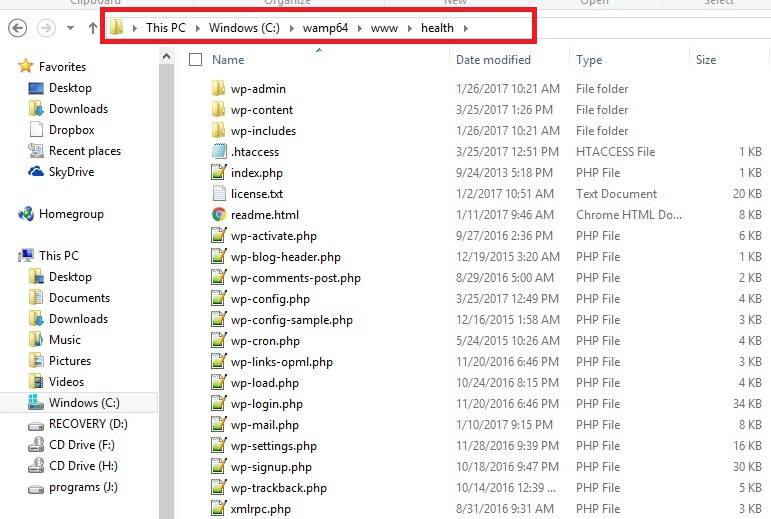
Basically, the picture below tells you the overview of the arrangement in my case from This PC to windows (C) and then to the www folder and finally to the health folder i created which contains the wordpress contents i downloaded.Just make sure your own looks just like mine and let’s continue
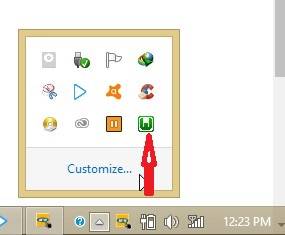
After that, make sure the Wamp server’s status is on and and its green. If Wamp is not working just left click and press the restart all services button and everything should work normally within 1 to 2 minutes.
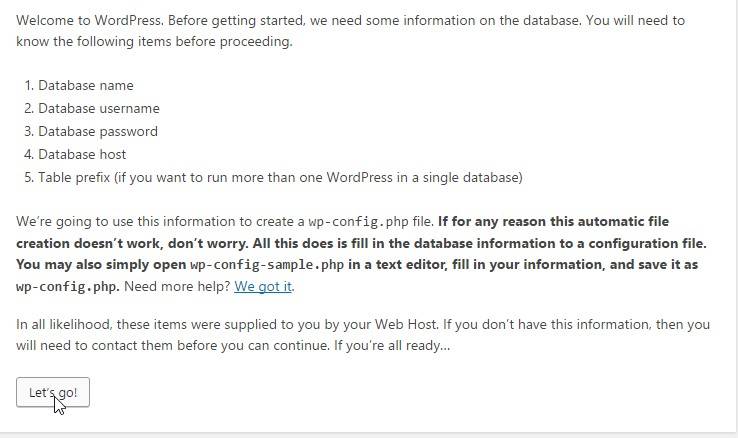
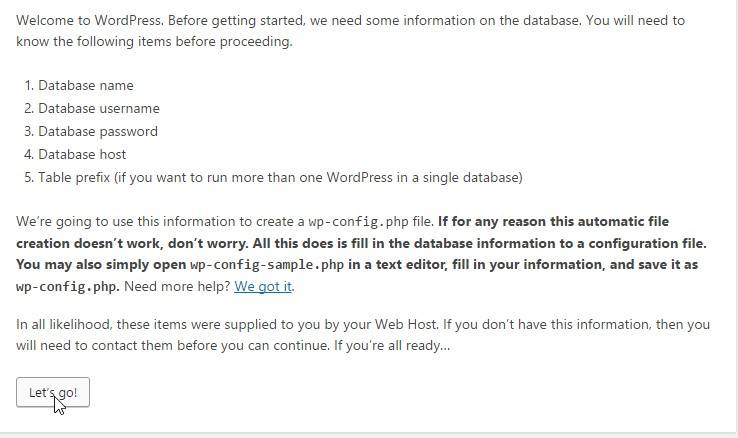
At this moment i assume everything is working properly so let’s continue. Open your web browser and type in localhost, click on the folder name you used, in my case ‘health’ and this will take you to the wordpress installation wizard. Alternatively you can type localhost/health where health is the name for my website which will bring you to the same installation wizard. WordPress will tell you in order to start the wizard it needs some information like the database name, database username, database password as well as the database host and table prefix. In this case we will concentrate on the first 3 as those are the most important things to do.
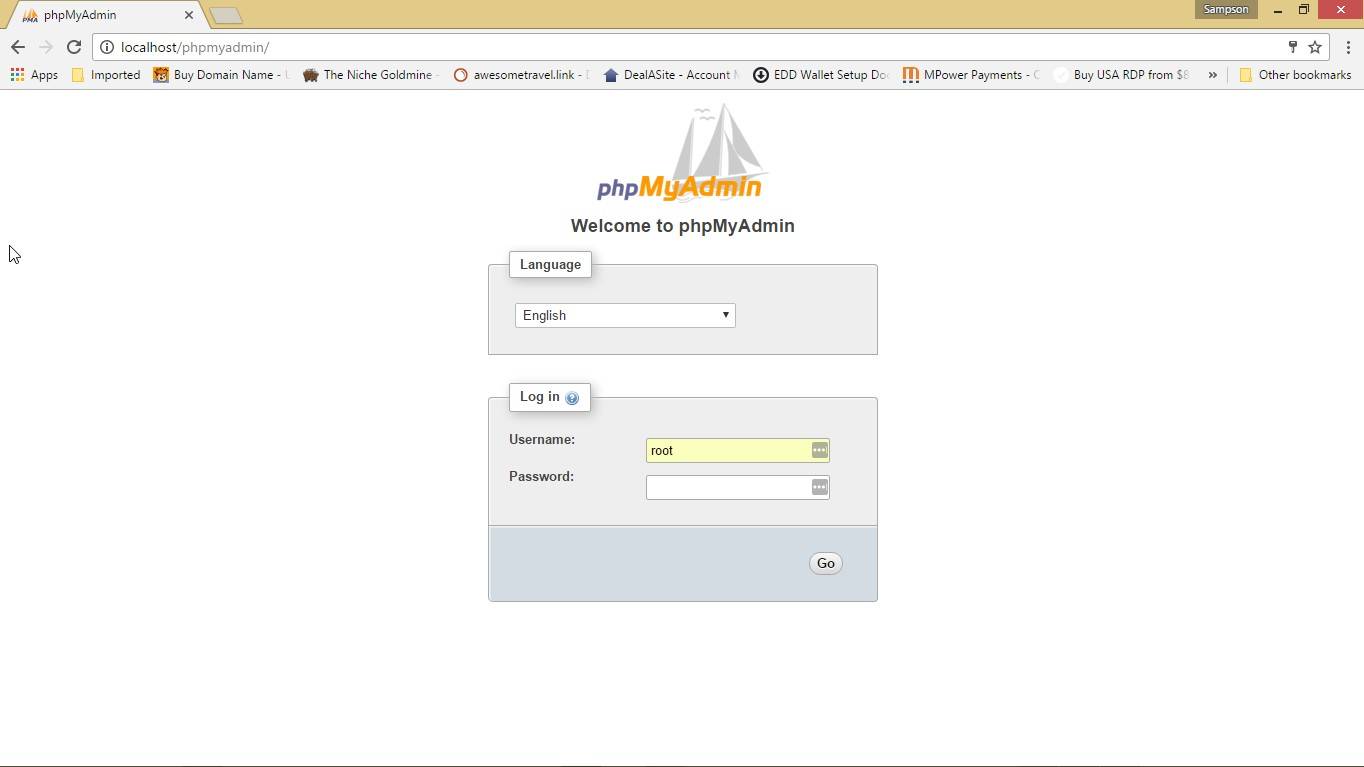
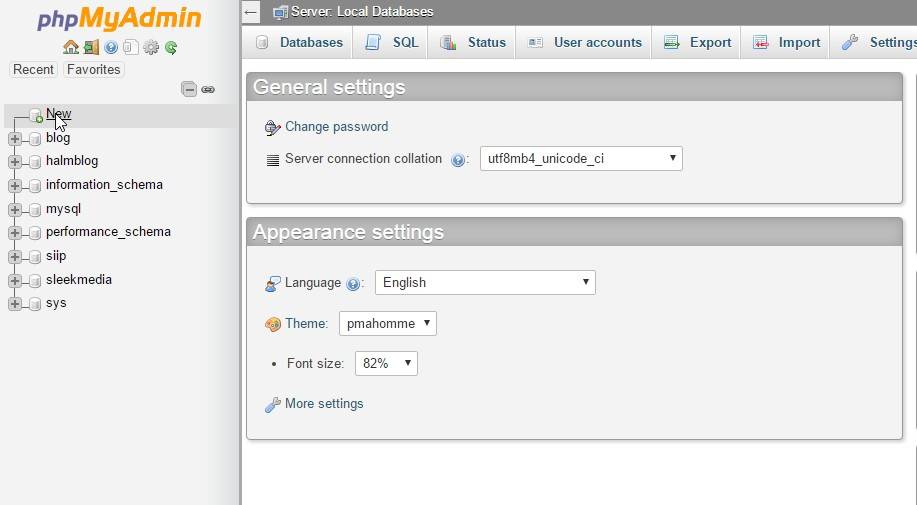
We will first start by creating a database name and this is very simple, just open a new tab and type in localhost/phpmyadmin and press enter. You will be taken to the php my admin page which will look exactly like what you are seeing below. If it prompts you to insert username and password, just put in root as username and leave the password field empty and click on Go.
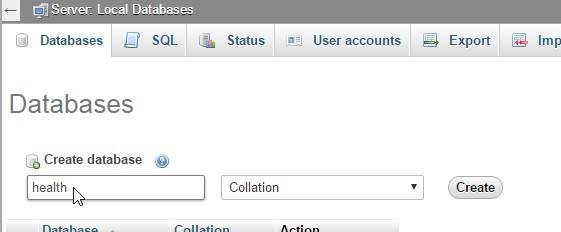
You will be taken to a similar page like what you are seeing below. Click on New and put the name of the database you want to create in my case i used ‘health’. You can use any name you want just make sure you remember the name. click create after putting in the name.
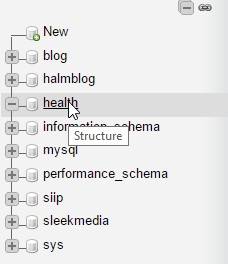
From the picture below, after clicking create, ‘health’ has been added to the list of my databases. If you see this then it means the database has been created so we can proceed to close that tab and continue from the wordpress installation wizard.
Now that we have our database name setup, we can proceed by clicking on the Let’s go! button.
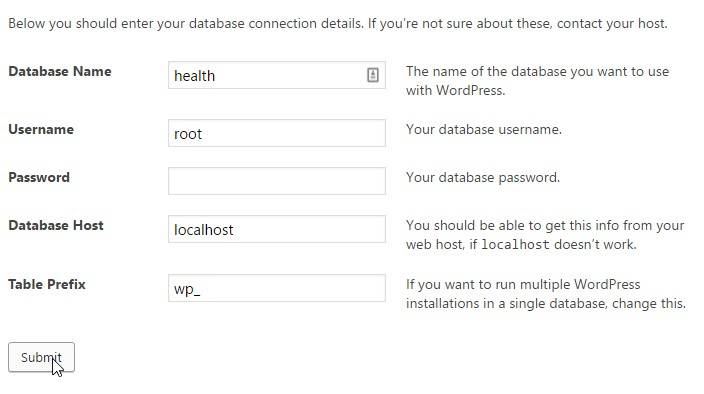
You will be brought to the picture you are seeing below and in the database Name field, put the name of the database you created there, in my case ‘health’. The username field should be root as that is the default and the password field must be empty. Let’s leave the rest as they are now and click on the submit button.
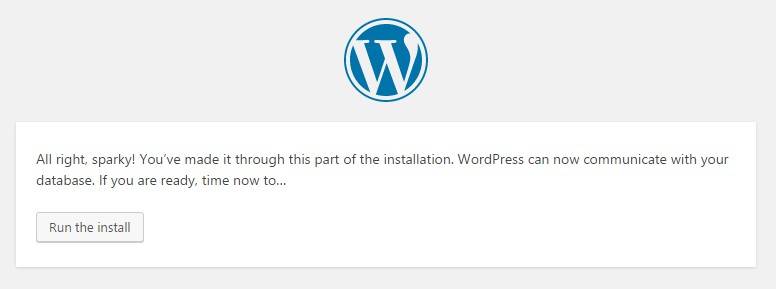
You will see something like the one below, just click on Run the install and the installation will begin.
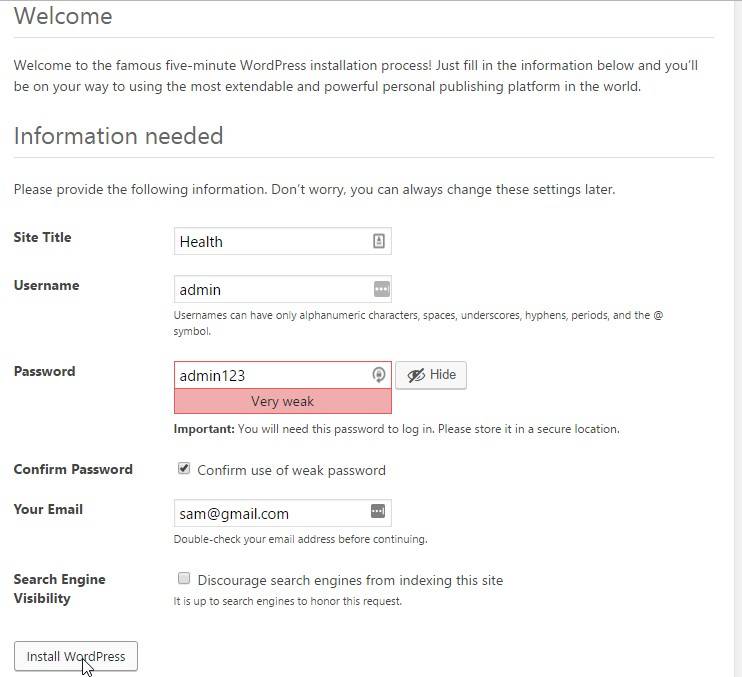
You will be presented with a welcome message and some needed information by wordpress, just put in the site title you want as your website, the username you prefer as well as the password. Put in the email you want wordpress to use when you forget your password details.
For my case i am going to create a website about Food so my site title will be Food. The username is very important as you will need that to login wordpress whenever you want to make changes to your site. In this case i will use ‘admin’ as my username and the password i want to use. Use a password you will easily remember and it must be a strong one too but since i am on a localhost, security is not my priority so i will put in any password i prefer . If your password is weak just tick the confirm use of weak password box and go to the email field and type your email there.
Click on install wordpress and if everything works correctly, you should see success! message right away.
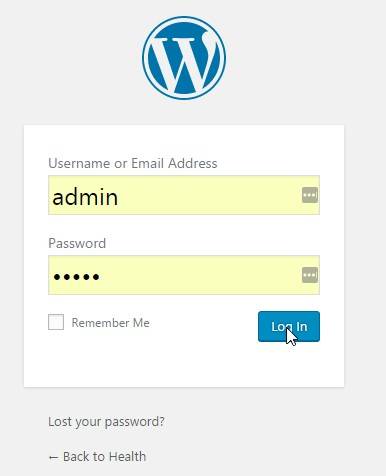
Type in the username and password you just setup and click on login.
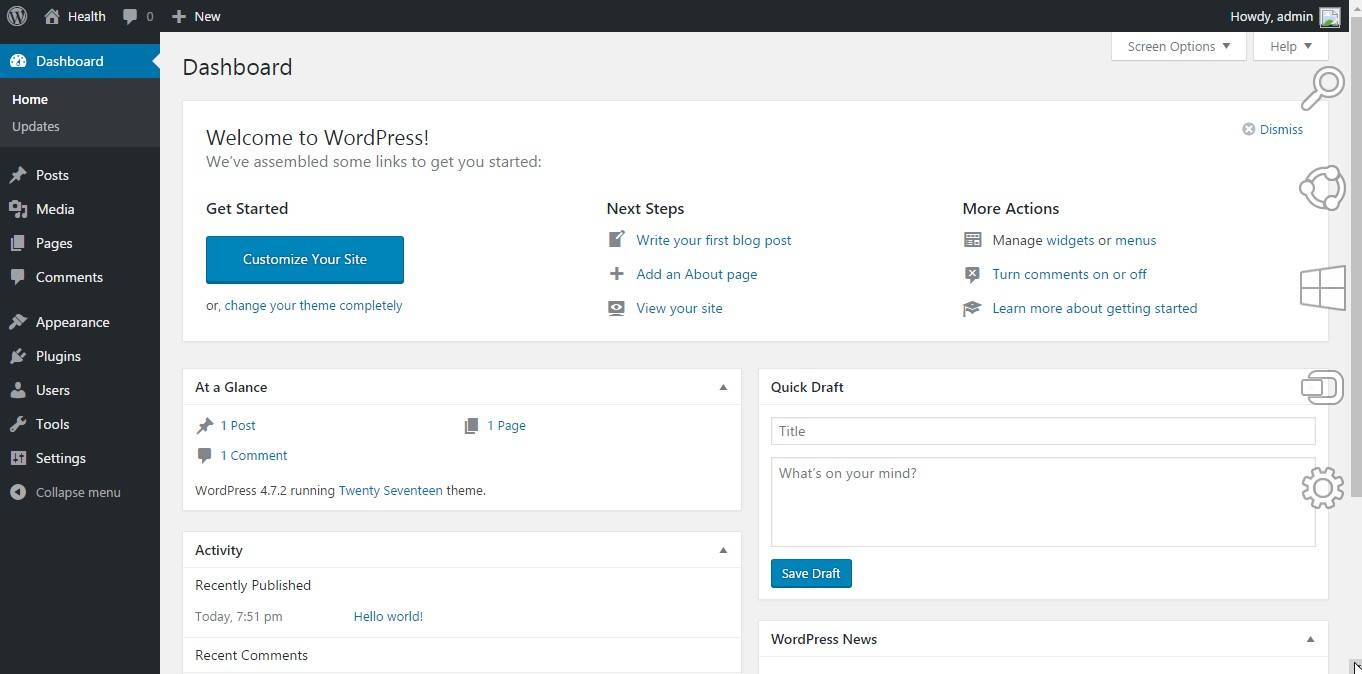
Congratulations! you just installed wordpress on your local machine and you deserve a beer for that. Take some time to drink a cup of water and come back let’s continue with the rest. Below is an overview of your dashboard which is basically the landing view of your admin area. Your wordpress website basically has two sides, the front end and the back-end. The front end is where your visitor sees and the back end(Admin Panel) is the password protected site available any time you want to create a content or otherwise manage your site. The picture below is an example of the back-end (admin area). If you want to access your back-end of your site, just type localhost followed by ‘/’ and your url followed by ‘/’ and wp-admin. (localhost/yourwebsitename/wp-admin). You will be taken to the login page where you will type in your credentials to login your account.
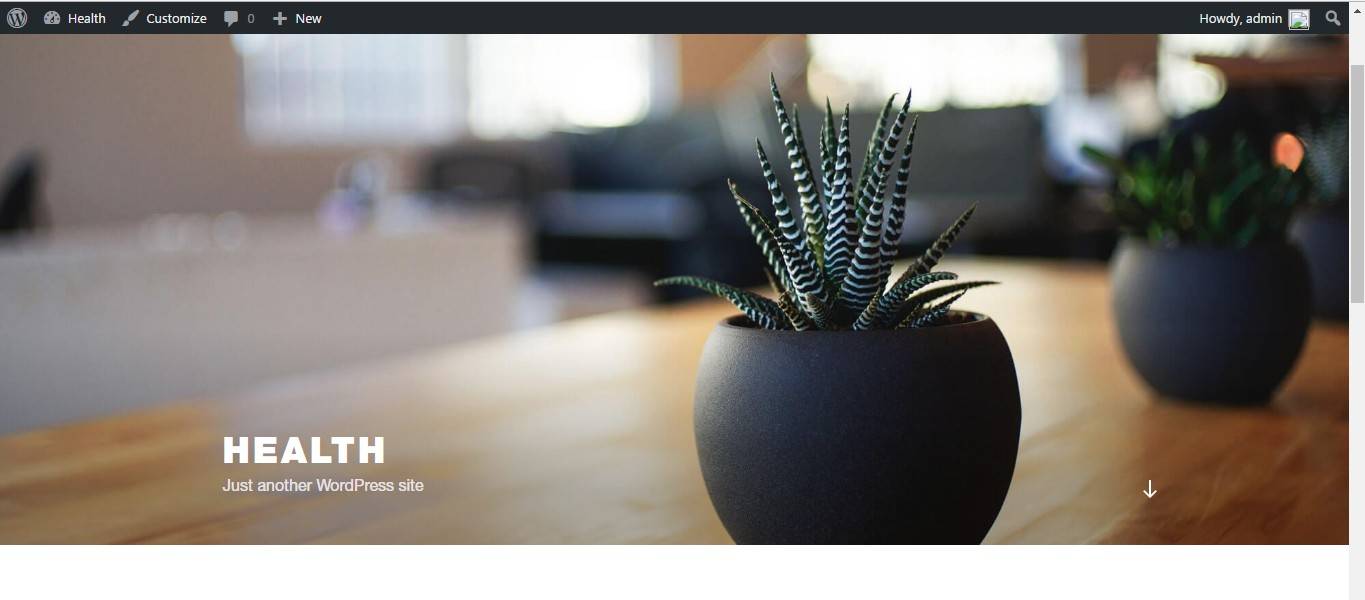
The front-end of your website is basically what your viewers see whenever they visit your site. To access your front end is as simple as typing in your website url (localhost/health). Alternatively you can do so in your dashboard by hovering your mouse over your site name and clicking on visit site as you see below.
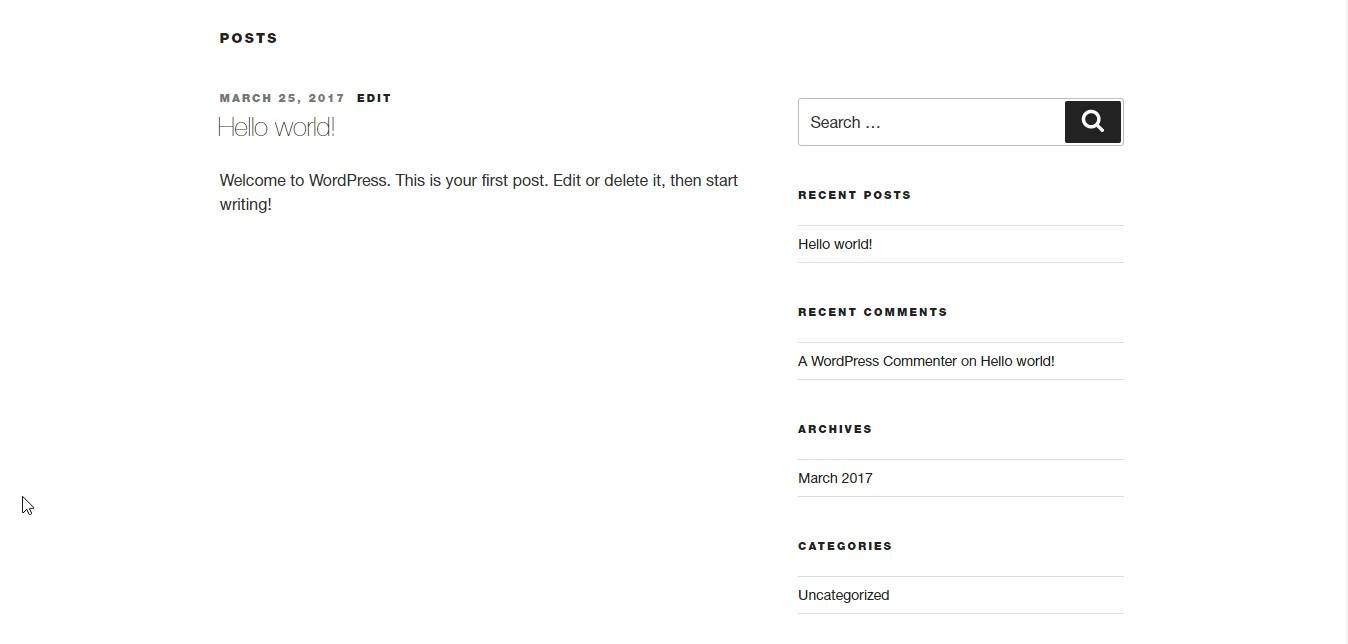
When you click that, you see the front-end of your website which is basically like the picture below. The default theme here is 2017 theme which comes pre-installed but you can change it to any theme you like which we will talk about later on as we progress along. Since we have not made any changes to the site yet, you will see some dummy content like ‘Hello World’ post and others. We can make changes to all these.
3. How to apply WordPress theme
To change the theme of the website, its actually simple. Just google the name of the theme you want and download it. Some are free while others are paid. For now i strongly recommend you stick to free themes as those will be very helpful. In my case i am going to use a theme i bought called ‘Sahifa’ which is basically one of the easiest themes to customize. Don’t worry if your theme is different from mine because everything i will teach will be the same. Basically themes come in .zip file extensions so make sure the theme you are going to download should be a .zip. You can also stick with the 2017 theme which comes pre-installed when you setup wordpress but i will teach you how to install a new theme.
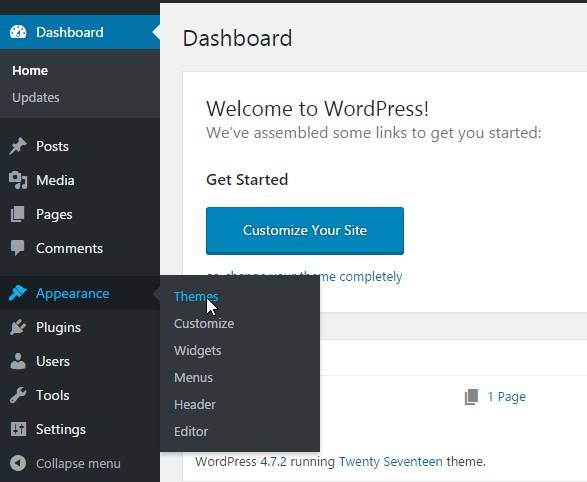
In your admin dashboard, hover your mouse to Appearance and this will bring another menu list. click on themes as you see below in the picture.
In the diagram below, you will see that our current theme is 2017 as i told you earlier on and you can see its active. To change it, just click on the Add New button just above the theme and you will be taken to another page to continue from there.
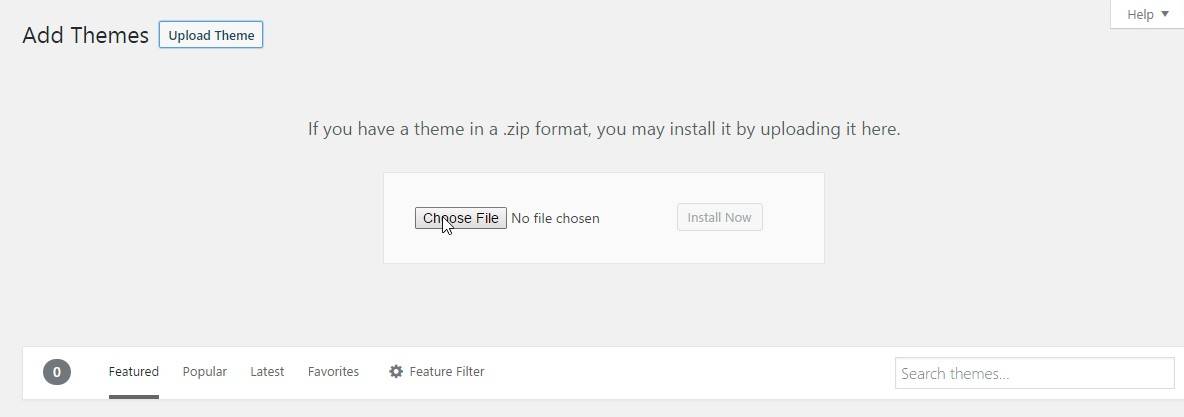
Click on upload theme to install the theme you want to use.
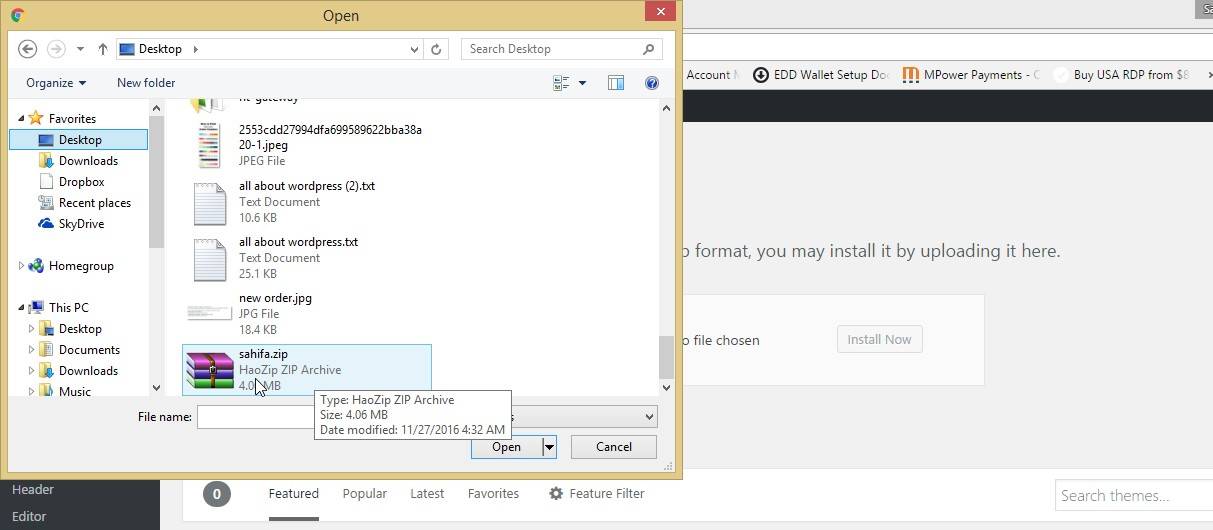
Click on choose file and locate the theme you want to use which is a .zip file.
In my case, the theme i want to use is the ‘sahifa’ theme so i will locate where i downloaded it and click on open.
You will be brought to the picture you are seeing below with the name of the theme you want to install, in my case sahifa.zip. Click on install now and it will install right away. When it finishes the installation , click on activate theme to make the theme active.
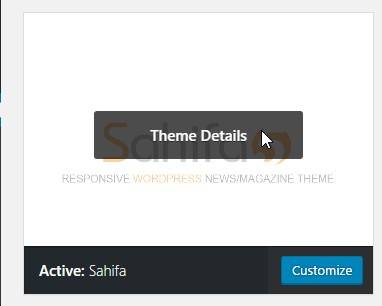
After clicking on install now button, activate theme. You will see that the theme you just installed will be Active, in my case the sahifa theme.
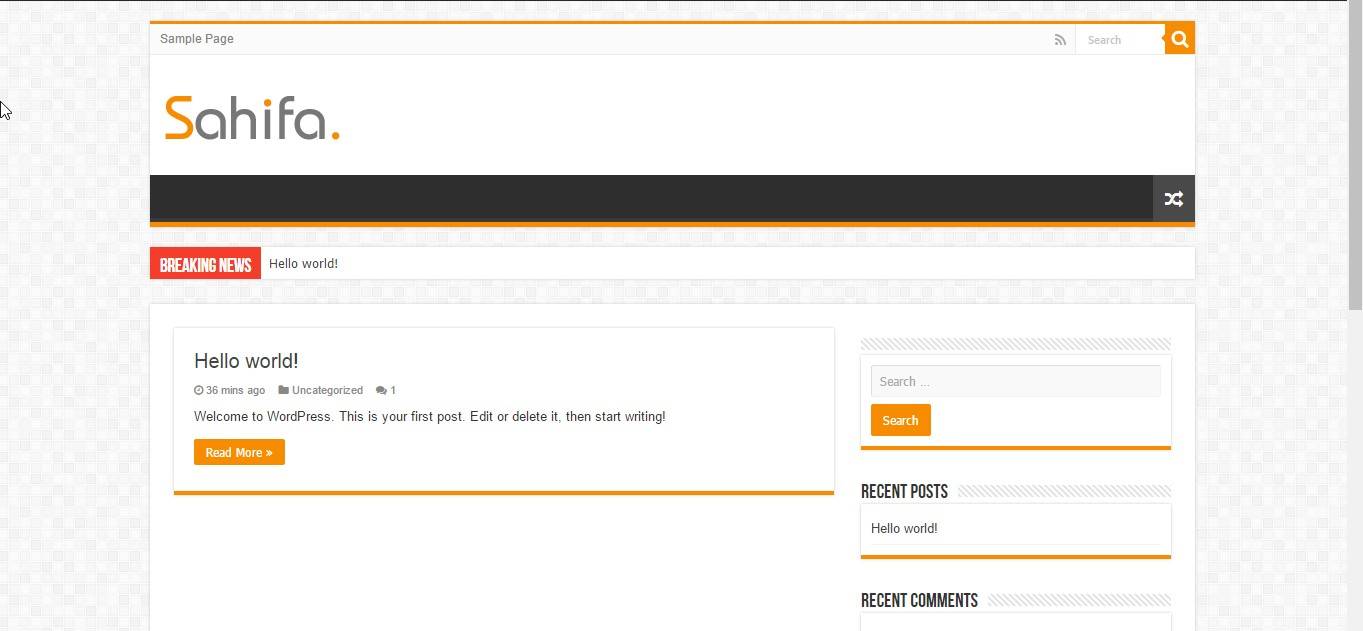
To see how the theme looks on the front end, just type in localhost/health (health is my domain name). From the picture below, i can see the theme got installed successfully and it’s looking kinda messy because I’ve not customized it but will do that later.
Congratulations on installing your own theme. You’ve just completed 50% of the work. My Next tutorial (Part 2) is going to be on how to create posts, pages and categories for your blog. If you have any questions just feel free to raise up your hand and i will call you right away. Your comments are most likely welcomed. Once again, Congrats!
CLICK HERE TO JOIN OUR WHATSAPP CHANNEL FOR LATEST UPDATE
CLICK TO SUBSCRIBE TO OUR NEW YOUTUBE CHANNEL
CLICK TO CHECK OUT THE LATEST NEWS IN GHANA
CONTACT (+233) 549-830-824 TO UPLOAD YOUR SONG ON HALMBLOG.COM









This is my first time pay a quick visit at here and i am really pleasant to read all at one place.
Thanks very much. Glad to help.
Wonder
I never knew this one though.
Well-done Halmblog
Thanks @ Bart Mintah
Pls can I change my current theme to a new theme? And how do I do that.?
Hi Samuel, you can change your theme depending on which platform you are on. For self hosted websites, it’s quite easy since there are lots of themes out there but for blogger hosted sites like wordpress.com, though there are number of themes out there, they are limited in number
I want to start as a blogger and i do not know that site i will start with can you help me with that sir….
You too God bless you for teaching us the young once.
1.Please if the wamp server at the notification or taskbar didn’t turn green, can I still continue Sir?
2. After creating my web and later lost my device, after I’ve gotten a new device, do I have to go through the new process?
Thanks for teaching me, may God always be with you.
Will like to call or chat you through this number +233557476687.
Love ❤❤❤ your web.
Thanks Mr. Halm.
hello! Please have succefully create the site but it can not be seen on google when i search for it.
Read and make more research on Search Engine Optimization. Thank you
Hello sir, I want to join your WhatsApp group o. Please Sir can you join me? I am visually impaired person so Sir please I need your help o Sir. I need audios about this o. Because of My situation, audio recordings are good for me o so Sir please can you help me
We are waiting for your next post about this ooo.
Thank you for sharing this valuable knowledge with us